The Art of Baking: Achieve a Flawless Makeup Finish That Lasts
The art of baking: setting your makeup for a flawless, long-lasting finish involves using a generous amount of translucent powder to set your foundation and concealer, allowing it to “bake” for several minutes before dusting off the excess, resulting in a smooth and airbrushed look that lasts all day.
Have you ever admired a makeup look that seems to stay put, looking flawless for hours on end? The secret might just be in mastering the art of baking: setting your makeup for a flawless, long-lasting finish. This technique, beloved by makeup artists and enthusiasts alike, can transform your daily routine and give you that airbrushed appearance you’ve always desired. Ready to learn how to achieve makeup perfection? Let’s dive in!
In this guide, we’ll explore every aspect of the art of baking: setting your makeup for a flawless, long-lasting finish, from choosing the right products to perfecting the technique. Whether you’re a makeup novice or a seasoned pro, you’ll find valuable tips and tricks to elevate your makeup game. Let’s unveil the secrets to a truly lasting and flawless finish together!
Understanding the Basics of Makeup Baking
Makeup baking, at its core, is a setting technique designed to create a smooth, crease-free, and long-lasting finish. It’s particularly effective for the under-eye area, where concealer tends to crease and fade. But understanding precisely how it works is key.
What Exactly Is Makeup Baking?
Baking involves applying a thick layer of translucent powder over concealer, allowing it to sit for several minutes (typically 5-10) while the heat from your face sets the makeup. This process allows the powder to absorb oils and fully set the concealer, preventing creasing and providing a brightening effect.
The Science Behind Baking
The heat generated by your skin during baking helps the powder and underlying makeup melt together, creating a seamless finish. This process not only sets your makeup but also fills in fine lines and imperfections, giving your skin a smoother appearance.
- Heat Activation: The warmth from your skin accelerates the setting process.
- Oil Absorption: The powder absorbs excess oils, preventing shine and creasing.
- Brightening Effect: Translucent powder reflects light, brightening the under-eye area.
Ultimately, successful makeup baking is about achieving a harmonious blend of technique and quality products, leading to a finish that not only looks impeccable but also endures throughout the day. The more familiar you are with the nuances, the better equipped you’ll be to tailor the method to suit your unique skin needs.
Choosing the Right Products for Baking
Selecting the right products is crucial for achieving the best results with the art of baking: setting your makeup for a flawless, long-lasting finish. Not all concealers and powders are created equal, and using the wrong ones can lead to a cakey or uneven finish.
Concealer Considerations
Opt for a creamy, full-coverage concealer that won’t dry out too quickly. Hydrating formulas are generally better, as they provide a smooth base for the powder. Avoid concealers that are too thick or heavy, as they can crease easily.
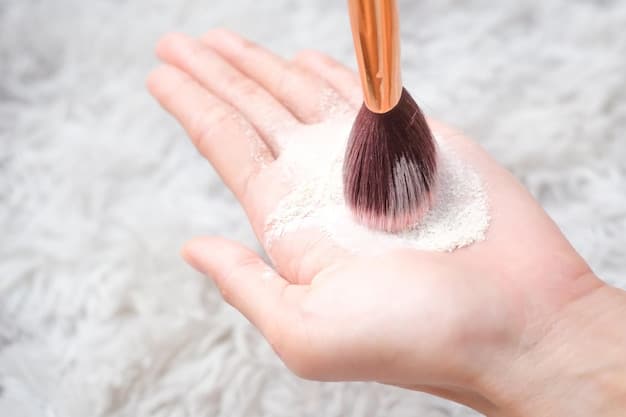
The Importance of Translucent Powder
Translucent powder is the star of the baking technique. It should be finely milled to prevent a chalky or cakey appearance. Look for powders that are truly translucent and won’t alter the color of your concealer.
- Finely Milled: Ensures a smooth and seamless finish.
- Truly Translucent: Won’t change the color of your makeup.
- Oil-Absorbing: Helps to control shine and prevent creasing.
Beyond just the core products, keep application tools in mind. The right brush or sponge can significantly impact the final look. Experiment with different applicators to see what gives you the most precise and even distribution of product.
Equally important is understanding how these products interact with your skin type. If you have dry skin, you might want to use a hydrating setting spray post-baking to add moisture back in. For oily skin, a more mattifying powder may be beneficial. Being adaptable is key to achieving the perfect bake, regardless of your skin’s specific needs.
Step-by-Step Guide to Baking Your Makeup
Now that you have the right products, let’s walk through the step-by-step process of the art of baking: setting your makeup for a flawless, long-lasting finish. Follow these steps carefully to achieve a professional-looking result.
Step 1: Prep Your Skin
Start with a clean, moisturized face. Apply your regular skincare routine, including moisturizer and primer. Allow the products to fully absorb before moving on to makeup.
Step 2: Apply Concealer
Apply your concealer in the areas you want to brighten and set, such as under the eyes, on the bridge of your nose, and on your chin. Blend it well with a damp makeup sponge or brush.
Step 3: Layer on the Powder
Using a damp makeup sponge, pick up a generous amount of translucent powder. Press the powder onto the concealed areas, creating a thick layer. Don’t be afraid to use a lot of product; this is essential for baking.
Step 4: Let It Bake
Allow the powder to sit on your skin for 5-10 minutes. During this time, you can work on other parts of your makeup, such as your eyeshadow or brows. The heat from your skin will help the powder set the makeup underneath.
Step 5: Dust Off the Excess
After the baking time is up, use a fluffy brush to gently dust off the excess powder. Be thorough, but avoid dragging the brush across your skin. You want to remove the powder without disturbing the makeup underneath.
- Gentle Dusting: Use a light hand to avoid disturbing the makeup.
- Fluffy Brush: Ensure the brush is soft and not too dense.
- Check for Residue: Make sure all excess powder is removed for a seamless finish.
After dusting, you can finish off with a setting spray to meld everything together seamlessly. Also, consider using a damp sponge to gently press the areas you’ve baked to ensure everything is perfectly smooth and no lines are visible. Remember, the goal is a flawless finish, so take your time and be attentive to detail.
Troubleshooting Common Baking Issues
Even with the right products and technique, baking can sometimes go wrong. Here are some common issues and how to fix them, ensuring the art of baking: setting your makeup for a flawless, long-lasting finish goes smoothly.
Cakey Finish
If your makeup looks cakey after baking, you may be using too much powder or not blending your concealer well enough. Try using a lighter hand with the powder and ensuring your concealer is fully blended before applying the powder.
Dryness and Cracking
Baking can sometimes cause dryness, especially for those with dry skin. Combat this by using a hydrating concealer and a moisturizing setting spray. You can also try baking for a shorter amount of time or skipping baking altogether in drier areas.
Uneven Application
Uneven application can lead to splotchy or patchy results. Make sure you’re applying the powder evenly and using a consistent amount of product. A damp makeup sponge can help distribute the powder more evenly.
- Use Less Product: Start with a small amount of powder and build up as needed.
- Hydrate Your Skin: Use a moisturizing primer and setting spray.
- Blend Thoroughly: Ensure all products are fully blended for a seamless finish.
Beyond these quick fixes, it’s wise to re-evaluate your product choices if you consistently face issues. Experiment with different concealers and powders until you find a combination that works best for your skin type and preferences. Sometimes, the solution is as simple as switching to a lighter formula or changing your application tool. Consistency is also key – practice regularly to hone your technique and identify what works best for your unique circumstances.
Advanced Tips and Tricks for Baking
Once you’ve mastered the basics, you can explore some advanced tips and tricks to take the art of baking: setting your makeup for a flawless, long-lasting finish to the next level.
Baking for Different Skin Types
Adjust your baking technique based on your skin type. Oily skin may benefit from a longer baking time and a more mattifying powder, while dry skin may require a shorter baking time and a hydrating setting spray.
Color Correcting with Baking
Use a tinted powder to color correct while baking. For example, a yellow-toned powder can help brighten dark circles, while a peach-toned powder can counteract dullness.
Baking for Special Occasions
For events where you need your makeup to last all night (weddings, parties, etc.), consider using a waterproof or long-wearing setting spray after baking. This will help lock in your makeup and prevent it from fading or smudging.
- Strategic Baking: Focus on areas prone to creasing and oiliness.
- Experiment with Tints: Use tinted powders for color correction.
- Long-Wearing Products: Choose waterproof and long-lasting formulas.
In your journey with advanced baking techniques, don’t shy away from incorporating additional skincare steps. A well-hydrated canvas is always going to yield better results, so consider adding a hydrating serum or facial oil to your routine before makeup application. Also, pay attention to how your skin feels throughout the day. If you notice any discomfort or excessive dryness, adjust your routine accordingly. The ultimate goal is to achieve a flawless finish without compromising the health and comfort of your skin.
| Key Point | Brief Description |
|---|---|
| 🌟 Translucent Powder | Finely milled powder is essential for a smooth, seamless finish. |
| ⏱️ Baking Time | Allow powder to set for 5-10 minutes for optimal results. |
| 💧 Hydration | Use hydrating products to combat dryness and cracking. |
| ✔️ Application | Apply powder evenly with a damp sponge for best results. |
Frequently Asked Questions
The art of baking: setting your makeup for a flawless, long-lasting finish is a technique that involves applying a thick layer of translucent powder to set concealer, letting it sit for a few minutes, and then dusting it off for a smooth, crease-free finish.
Yes, but use hydrating products and bake for a shorter time. Follow up with a moisturizing setting spray to add hydration back into your skin, ensuring no dryness.
A finely milled translucent powder is ideal. It should be lightweight and not alter the color of your concealer, providing a seamless finish. Avoid heavy or cakey powders.
Typically, 5-10 minutes is recommended. However, adjust the time based on your skin type; shorter times for dry skin and longer times for oily skin will provide the best results.
Yes, it can! Choose a translucent powder that truly matches your skin tone. Also, ensure that you are dusting off all the excess powder so it does not give your skin an ashy look.
Conclusion
Mastering the art of baking: setting your makeup for a flawless, long-lasting finish can revolutionize your makeup routine. By understanding the technique, choosing the right products, and practicing regularly, you can achieve a smooth, crease-free, and long-lasting finish.
So, go ahead and experiment with baking, personalize it to fit your unique needs, and enjoy the confidence that comes with a flawless makeup look! With consistent practice and attention to detail, you’ll be baking your way to makeup perfection in no time.


