Smokey Eye Tutorial: Your Step-by-Step Evening Look Guide
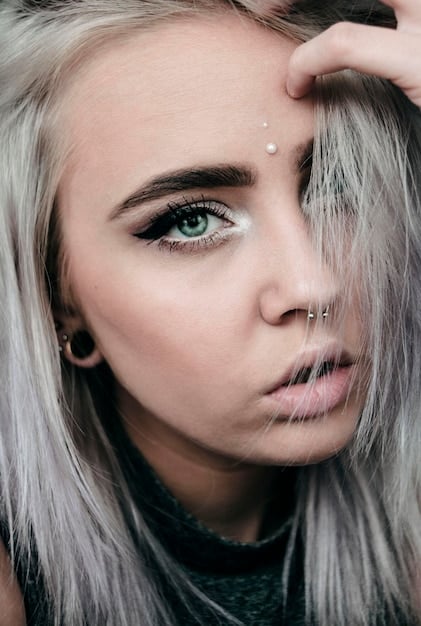
Master the classic smokey eye with our step-by-step tutorial. This guide provides easy-to-follow instructions for creating a stunning evening look with professional techniques, perfect for beginners and makeup enthusiasts alike. Get ready to elevate your makeup game with this comprehensive Smokey Eye Tutorial: A Step-by-Step Guide to a Classic Evening Look.
Ready to create a captivating smokey eye that turns heads? The smokey eye is a timeless makeup look that can be adapted for any occasion. This Smokey Eye Tutorial: A Step-by-Step Guide to a Classic Evening Look will provide you with all the essential techniques and tips to achieve a flawless, sultry look.
Whether you’re a makeup novice or a seasoned pro, this guide will break down the process into easy-to-follow steps. Prepare to unleash your inner makeup artist and master the art of the smokey eye!
Smokey Eye Tutorial: Understanding the Basics
Before diving into the step-by-step instructions, it’s important to understand the core principles behind a classic smokey eye. This involves blending, layering, and choosing the right products and tools to achieve that flawless, gradient effect.
Key Products for a Smokey Eye
To achieve a professional-looking smokey eye, you’ll need a few essential products. Investing in quality products can make a significant difference in the final result and ease of application.
- Eyeshadow Primer: Creates a smooth base for your eyeshadow, preventing creasing and enhancing color payoff.
- Eyeshadow Palette: Choose a palette with a range of neutral shades, including matte black, dark browns, and shimmer highlights.
- Blending Brushes: Essential for achieving a seamless gradient. Invest in a few different sizes for precision and blending.
- Eyeliner: A black eyeliner pencil or gel liner is crucial for defining the lash line and adding depth.
- Mascara: Adds volume and length to your lashes, completing the smokey eye look.
Understanding these basic elements is crucial before proceeding with a more detailed Smokey Eye Tutorial: A Step-by-Step Guide to a Classic Evening Look.
In summary, mastering the fundamentals—from understanding the requisite tools to comprehending essential techniques—is foundational to realizing a successful smokey eye. Applying this knowledge sets the stage for more advanced methodologies. The next step involves gathering the necessary materials and laying the groundwork for a seamless, eye-catching gradient.
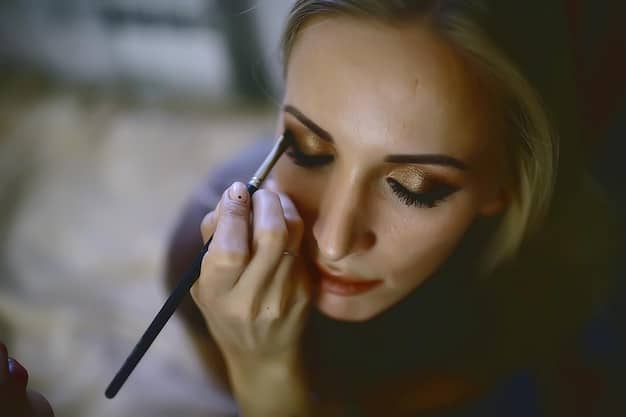
Step-by-Step: Achieving the Perfect Smokey Eye
Now, let’s get into the actual step-by-step process of creating a stunning smokey eye. Follow these instructions carefully to achieve a professional result at home.
Step 1: Prime Your Eyelids
Start by applying an eyeshadow primer to your eyelids. This will create a smooth canvas and prevent your eyeshadow from creasing throughout the evening. Wait a few moments for the primer to dry before moving on to the next step.
Step 2: Apply a Base Eyeshadow
Using a fluffy brush, apply a neutral eyeshadow shade (such as a light brown or taupe) all over your eyelid, from lash line to brow bone. This will serve as a base for your darker eyeshadows and help with blending.
Step 3: Add Depth with a Darker Shade
Take a smaller blending brush and apply a medium-dark eyeshadow shade (such as a dark brown or gray) to your eyelid, focusing on the outer corner and crease. Blend the color inwards, creating a gradient effect. Ensuring proper blending is critical for the Smokey Eye Tutorial: A Step-by-Step Guide to a Classic Evening Look.
- Control the Color: Start with a small amount of product and build up the intensity gradually.
- Blend, Blend, Blend: Use circular motions to blend the edges of the eyeshadow, creating a seamless transition.
- Use a Clean Brush: A clean blending brush can help to soften harsh lines and create a more diffused effect.
By using these processes properly, you’ll go a long way to executing the smokey eye look like a pro.
To summarize, priming the eyelids guarantees a polished base, while the strategic placement and adept blending of deeper shades create depth and shape; these methods will greatly contribute to your skill in performing a smokey eye like a pro.
Intensifying the Look: Eyeliner and Lower Lash Line
To further enhance the smokey effect, eyeliner is an essential tool. And defining the lower lash line adds an extra dimension to the overall look.
Lining the Upper Lash Line
Use a black eyeliner pencil or gel liner to line your upper lash line. Create a thin line that gradually thickens towards the outer corner of your eye. You can also smudge the eyeliner with a small brush for a softer, more diffused look.
Defining the Lower Lash Line
Apply a small amount of the same dark eyeshadow you used on your upper lid to your lower lash line. Use a small, angled brush for precision. Smudge the color slightly for a smokey effect.
Highlighting the Inner Corner
Apply a shimmer or light eyeshadow to the inner corner of your eye. This will help to brighten your eyes and add a touch of glamour. A little shimmer can make a big difference, especially when following this Smokey Eye Tutorial: A Step-by-Step Guide to a Classic Evening Look.
Applying eyeliner to the upper lash line accentuates the eyes, while accurately defining the lower lash line deepens the smoldering impact. Finally, highlighting the inner corners adds a brightening contrast, creating the appearance of alert, sparkling eyes.
In conclusion, these detailed steps, executed accurately, blend together to enhance the smokey eye appearance as a whole. From creating a smooth effect to adding depth with eyeliner, each step amplifies eye appeal.
Finishing Touches: Mascara and Brow Definition
With the eyeshadow and eyeliner in place, it’s time for the finishing touches that will truly complete your smokey eye look: mascara and brow definition.
Applying Mascara
Apply several coats of mascara to your upper and lower lashes. This will add volume and length, making your eyes appear larger and more dramatic. Be sure to coat each lash evenly to prevent clumping.
Defining Your Eyebrows
Fill in your eyebrows with a brow pencil or powder that matches your natural hair color. Use short, feathery strokes to create a natural-looking shape. Well-defined brows will frame your eyes and complete your smokey eye look. This step is often overlooked, but it’s essential for a polished finish in any Smokey Eye Tutorial: A Step-by-Step Guide to a Classic Evening Look.
With all of the focus on the makeup itself sometimes things like the eyebrows can be forgotten. This attention to detail takes your final style to the next level. With these added tips, you’ll be sure to create an amazing effect.
- Use a spoolie brush: Brush through your brows with a spoolie brush to blend the color and soften any harsh lines.
- Set your brows with gel: Apply a clear brow gel to keep your brows in place all night long.
- Choose the right shade: Select a brow product that matches your natural hair color for the most natural look.
In summary, these finalizing steps amplify the whole smokey eye aesthetic. Several coats of mascara to add flair, combined with defined eyebrows, not only completes the look but also strengthens the overall impact, perfectly fusing beauty and balance.
Adapting the Smokey Eye for Different Occasions
One of the great things about the smokey eye is that it’s incredibly versatile. With a few tweaks, you can adapt it for various occasions, from a night out to a more subtle daytime look.
For a Night Out
For a dramatic evening look, intensify the darkness of your eyeshadow and eyeliner. Add a touch of shimmer to the center of your eyelid for extra glamour. Don’t be afraid to experiment with bold colors or glitter.
For a Subtle Daytime Look
For a more subtle daytime smokey eye, use lighter shades of eyeshadow, such as browns or grays. Skip the eyeliner or use a soft brown eyeliner pencil. Apply a single coat of mascara and keep your brows natural.
Experimenting with Colors
While black and gray are classic choices for a smokey eye, don’t be afraid to experiment with other colors. Deep purples, blues, and greens can create stunning and unique smokey eye looks. Matching your eyeshadow to your outfit or eye color can also be a fun way to personalize your look. The key is to follow the basic blending and layering techniques, regardless of the colors you choose. This part of the Smokey Eye Tutorial: A Step-by-Step Guide to a Classic Evening Look is all about creativity.
In essence, versatility defines the smokey eye’s allure. Adaptable to both vibrant nights and discreet daytime aesthetics, it also welcomes individual color experiments. The secret to this lies in preserving its fundamental blending and layering practices, resulting in a tailored and striking visual statement.
Troubleshooting Common Smokey Eye Mistakes
Creating a perfect smokey eye can be challenging, and it’s common to encounter a few hiccups along the way. Here are some tips for troubleshooting common mistakes.
Eyeshadow Fallout
Eyeshadow fallout (when loose powder falls onto your cheeks) can be a frustration. To prevent fallout, tap off excess powder from your brush before applying eyeshadow. You can also hold a tissue under your eye to catch any stray powder. Another technique is to apply your eye makeup before your foundation.
Uneven Blending
Uneven blending can result in a patchy or muddy-looking smokey eye. To avoid this, use a clean blending brush and blend the edges of your eyeshadow in circular motions. Take your time and be patient – blending is key to achieving a seamless gradient.
Too Much Product
Applying too much product at once can make it difficult to blend and control the intensity of your smokey eye. Start with a small amount of product and build up the color gradually. It’s always easier to add more product than to take it away.
| Key Point | Brief Description |
|---|---|
| ✨ Essential Products Makeup | Primer, eyeshadow palette, eyeliner, blending brushes, and mascara. |
| 🎨 Blending techniques | Use small portions and circular motions. Work slowly. |
| 👁️ Brow impact | Proper brows add sophistication and beauty. |
Frequently Asked Questions
The essentials include eyeshadow primer, a neutral eyeshadow palette, blending brushes, black eyeliner (pencil or gel), and mascara. These products will help you create a seamless, professional-looking smokey eye.
To prevent fallout, tap off excess powder from your brush before applying eyeshadow. You can also hold a tissue under your eye or apply your eye makeup before your foundation to catch any stray powder.
Absolutely! Feel free to experiment with colors like deep purples, blues, or greens. The key is to maintain the blending and layering techniques while using your preferred colors to match your style.
For a subtle daytime smokey eye, use lighter shades of eyeshadow, such as browns or grays. Skip the eyeliner or use a soft brown eyeliner pencil. Apply a single coat of mascara and keep your brows natural.
Use a clean blending brush and blend in a gradual, almost feathered effect. Circular motions can help. Take time, and be patient while blending. That will help create a smooth and diffused effect.
Conclusion
Mastering the smokey eye is now within your reach, thanks to this comprehensive guide. By following each step diligently and adapting the techniques to suit your personal style, you’ll be able to create stunning smokey eye looks for any occasion. The Smokey Eye Tutorial: A Step-by-Step Guide to a Classic Evening Look is your toolkit to mastering beauty and style.
Practice makes perfect, so don’t be discouraged if your first attempt isn’t flawless. Keep experimenting, and you’ll be creating captivating smokey eyes in no time!


