Creating a Gradient Lip: A Step-by-Step Tutorial for a Trendy Look
Creating a gradient lip is a trendy makeup technique that blends two or more lip colors for a soft, dimensional effect. This tutorial provides a step-by-step guide to achieving this fashionable look, perfect for adding a touch of K-beauty to your style.
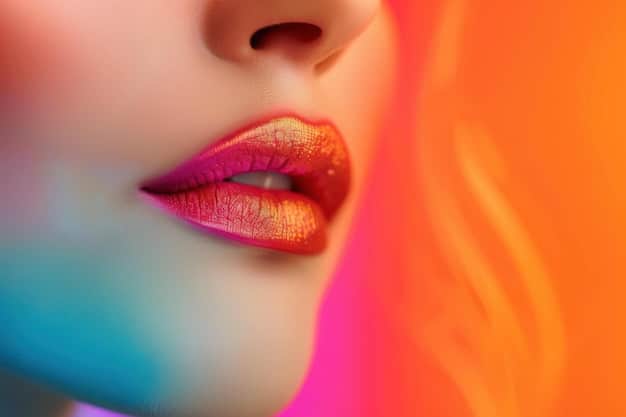
The gradient lip, also known as the “ombré lip” or “bitten lip,” is a popular makeup trend that originated in South Korea. It’s all about creating a soft, diffused look with a focus on the center of the lips, fading outwards. Want to achieve this effortlessly chic look? This tutorial will show you how!
What is Creating a Gradient Lip: A Step-by-Step Tutorial for a Trendy Look?
Creating a gradient lip is a makeup technique that gives your lips a soft, blurred effect, similar to the look of popsicle-stained lips. It involves using multiple shades of lip color to create a seamless transition from the center of your lips to the outer edges. But why is this style so popular?
The Appeal of Gradient Lips
Gradient lips offer a fresh, youthful appearance. They subtly enhance your natural lip shape and add a touch of color without being too overpowering. This makes them perfect for both everyday wear and special occasions.
- Subtle Enhancement: Provides a natural-looking color boost.
- Youthful Appearance: Creates a soft, diffused effect that looks fresh.
- Versatile: Suitable for various occasions, from casual to formal.
This trend isn’t just about aesthetics; it’s also about expressing a sense of effortless beauty. It’s a way to look polished without appearing overly made-up. This method to creating a stunning gradient lip provides a complete guide for achieving that perfect, trendy look.
Essential Products for Creating a Gradient Lip: A Step-by-Step Tutorial for a Trendy Look
To achieve the perfect gradient lip, you’ll need a few key products in your makeup bag. Don’t worry; you probably already have most of these!
Must-Have Lip Products
Having the right tools can make or break your gradient lip look. Here’s a list of products that you should use to achieve the look easily.
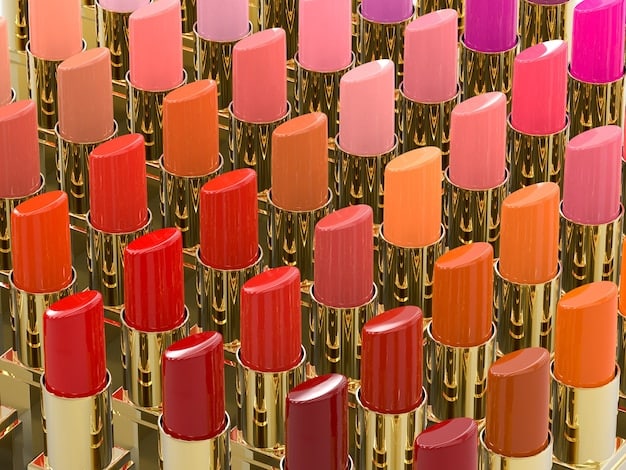
- Lip Tint: The star of the show. Choose a vibrant color that you love.
- Lipstick: A slightly lighter or darker shade of your lip tint works best.
- Concealer or Foundation: To create a clean base and define the edges.
- Lip Balm: Hydrated lips are essential for a smooth application.
Beyond these essentials, a lip brush or even your fingertip can be useful for blending the colors seamlessly. Remember, the goal is to create a soft, diffused effect, so blending is key. Choosing the correct colors and products is important for creating a gradient lip.
Step-by-Step: Creating a Gradient Lip – A Step-by-Step Tutorial for a Trendy Look
Now, let’s dive into the actual process. Creating a gradient lip might seem intimidating, but it’s surprisingly easy once you get the hang of it.
Step 1: Prep Your Lips
Start with a clean slate. Exfoliate your lips gently with a lip scrub or a soft toothbrush to remove any dead skin. Follow up with a hydrating lip balm and you will start the process of creating a gradient lip.
Step 2: Create a Base
Apply a thin layer of concealer or foundation to your lips. This will neutralize your natural lip color and provide a blank canvas for the gradient effect. Blend well.
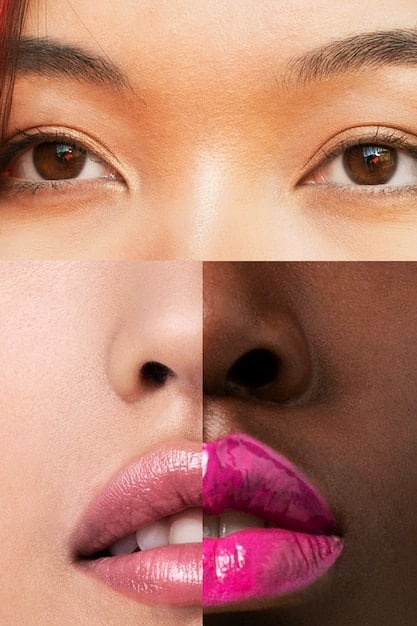
Step 3: Apply the Main Color
Using your lip tint or lipstick, apply the color to the center of your lips, both top and bottom. Don’t worry about being precise; the goal is to concentrate the color in the middle.
Step 4: Blend, Blend, Blend
Use a lip brush or your fingertip to gently blend the color outwards towards the edges of your lips. The edges should have a diffused, soft look.
Step 5: Add a Second Color (Optional)
For a more dramatic effect, you can add a second color to the very center of your lips. This should be a slightly darker or brighter shade than your main color. Blend well.
Step 6: Clean Up the Edges
Use a cotton swab dipped in concealer to clean up the edges of your lips and create a crisp, defined line. This will enhance the gradient effect.
Step 7: Set with Powder (Optional)
To make your gradient lip last longer, you can lightly dust a translucent powder over your lips. This will help set the color and prevent it from smudging.
Following these steps, you’ll be well on your way to mastering the gradient lip! The secret lies in the blending, so take your time and work in thin layers.
Tips and Tricks for Creating a Gradient Lip: A Step-by-Step Tutorial for a Trendy Look
Want to take your gradient lip game to the next level? Here are some extra tips and tricks to help you create the perfect pout.
Choosing the Right Colors
Color selection is key. Experiment with different combinations to find what works best for you. Here are a few ideas:
- Berry Tones: A deep berry shade in the center, fading into a lighter pink at the edges.
- Red and Orange: A classic red in the center, blending into a soft orange.
- Peach and Pink: A peachy hue in the center, fading into a light pink.
Achieving a Seamless Blend
Blending is the most important part of creating a gradient lip look. Here’s how to ensure a smooth transition:
- Use a Lip Brush: A lip brush provides more control and precision than your finger.
- Work in Thin Layers: Applying too much product at once can make blending difficult.
- Blend Outwards: Always blend the color outwards towards the edges of your lips.
Creating a gradient lip becomes easier with practice, so don’t be afraid to experiment. Different lip tints, lipstick finishes, and color pairings can lead to unique and personalized looks. You can try creating a gradient lip by following each step.
Troubleshooting Common Issues When Creating a Gradient Lip: A Step-by-Step Tutorial for a Trendy Look
Sometimes, creating a gradient lip can be a bit tricky. Here are some common issues and how to fix them.
Color Doesn’t Blend Well
If your colors aren’t blending seamlessly, try these solutions:
- Use a Lip Brush: A lip brush provides better control for blending.
- Use a Lip Balm: A hydrating base helps the colors glide more smoothly.
- Apply in Small Amounts: Overloading product can make blending difficult.
Color Fades Too Quickly
To make your gradient lip last longer, try these techniques:
- Use a Lip Primer: A lip primer creates a base for the color to adhere to.
- Set with Powder: Lightly dusting translucent powder over your lips can help set the color.
- Use Long-Lasting Products: Opt for lip tints and lipsticks known for their staying power.
Remember, the key to creating a gradient lip look is patience and practice. Don’t get discouraged if your first attempt isn’t perfect. With a few tweaks and adjustments, you’ll be rocking the gradient lip trend like a pro!
| Key Point | Brief Description |
|---|---|
| 💄 Lip Prep | Exfoliate and hydrate for smooth color. |
| 🎨 Color Application | Apply color to the center; blend outwards. |
| 🖌️ Blending | Ensure a seamless transition between colors. |
| ✨ Edge Definition | Use concealer for sharp, clean edges. |
Frequently Asked Questions
A gradient lip, also known as an ombré or bitten lip, features a concentration of color in the center, fading towards the edges. It is trendy for its youthful, soft look and its roots to K-Beauty trends, offering a subtly enhanced appearance that’s versatile.
To achieve this coveted beauty look, the essential items you would need are a lip tint or lipstick, concealer or foundation, and lip balm. Also, a lip brush may assist to blend the colours.
To seamlessly blend the colors, using a lip brush is highly recommended. Working in thin layers to prevent product overload and using a hydrating lip balm as base are also very helpful to achieving a blended colour when creating a gradient lip.
To prevent color from fading, use a lip primer to create a base, set your lips with translucent powder, and opt for long-lasting tints and lipsticks. Hydration helps improve the colours ability to stay.
Yes, for a unique twist in gradient looks, try mixing textures. Experimenting with matte and glossy formulas will enhance the depth, but it’s important to ensure the products used are still blended well for a more harmonious gradient outcome.
Conclusion
Creating a gradient lip is a fun and easy way to add a touch of K-beauty to your makeup routine. With the right products and techniques, you can achieve a soft, diffused lip look that’s perfect for any occasion. Keep on practicing and experimenting with different colors, and find your ideal lip gradient.


