Color Correcting 101: Your 2025 Guide To Flawless Skin
Achieving a perfect complexion through makeup often involves more than just foundation, with color correcting emerging as a vital technique to neutralize skin discolorations for a truly flawless finish.
Embarking on the journey to a truly flawless complexion can feel daunting, but with the right techniques, it’s more accessible than you might think. This guide, Color Correcting 101: A Beginner’s Guide to Flawless Skin in 2025, aims to demystify the art of color correcting, providing you with the essential knowledge to neutralize skin discolorations and achieve a radiant base.
Understanding the Science of Color Correcting
Color correcting isn’t magic; it’s the application of basic color theory to address skin imperfections. Just as artists mix paints to achieve desired shades, we use specific color correctors to neutralize unwanted tones in our skin before applying foundation or concealer. This technique ensures that your base makeup looks natural and even, rather than gray or ashy.
The core principle revolves around the color wheel. Colors directly opposite each other on the wheel are considered complementary, meaning they cancel each other out when applied correctly. For instance, green is opposite red, so a green color corrector is used to neutralize redness. Similarly, peach or orange tones oppose blue and purple, making them ideal for camouflaging dark circles under the eyes.
The Color Wheel and Your Skin Concerns
Knowing which color corrector to use is the first step toward a perfected complexion. Each shade targets a specific issue, ensuring that you’re not just covering up, but truly addressing the underlying discoloration.
- Green: Directly opposite red, green excels at neutralizing redness from blemishes, rosacea, or flushed skin.
- Peach/Orange: These shades combat blue or purple tones, making them perfect for dark under-eye circles or hyperpigmentation on medium to deep skin tones.
- Yellow: Ideal for brightening dullness and canceling out purple veins or bruises on fair to light skin tones.
- Lavender/Purple: This color counteracts yellow tones, making it effective for sallow or dull complexions, bringing vibrancy back to the skin.
The beauty of color correcting lies in its ability to create a clean canvas. By addressing the underlying discoloration, you require less foundation and concealer, resulting in a more natural, less “caked-on” look. This approach not only improves the appearance of your skin but also extends the wear time of your makeup, as the corrected areas remain neutral throughout the day.
In essence, color correcting is a fundamental step in achieving a truly flawless finish. It’s about working with your skin’s natural tones, rather than against them, to create a harmonious base that enhances your overall makeup application.
Identifying Your Skin’s Undertones and Concerns
Before diving into the world of color correctors, understanding your skin’s undertones and identifying specific areas of concern is crucial. This personalized approach ensures you select the most effective shades and apply them where they’ll make the most impact. Undertones refer to the subtle colors beneath the surface of your skin, and they typically fall into three categories: warm, cool, or neutral.
To determine your undertone, observe the veins on your wrist: if they appear blue, you likely have cool undertones; if they look green, you have warm undertones. If you see a mix of both, or they’re indistinguishable, you probably have neutral undertones. This knowledge, while not directly related to color correcting shades, is vital for selecting your foundation and concealer, ensuring your corrected skin ultimately blends seamlessly with your overall complexion.
Common Skin Concerns and Their Corresponding Color Correctors
Each skin concern presents a unique challenge, but thankfully, there’s a color corrector designed to address it. Pinpointing your primary issues will guide your product selection.
- Redness (Acne, Rosacea, Sunburn): This is one of the most common concerns. Whether it’s a persistent flush from rosacea or an angry blemish, a green corrector will be your go-to. Its cool tones effectively neutralize the warmth of red.
- Dark Circles (Blue/Purple): Often a result of genetics, lack of sleep, or thin skin, dark circles can make you look tired. For those with fair to medium skin, a peach corrector works wonders. For deeper skin tones, a true orange corrector is more effective at canceling out pronounced blue or purple undertones.
- Dullness/Sallowness (Yellow/Ashy Tones): If your skin appears lifeless or has a yellowish cast, particularly in certain lighting, a lavender or purple corrector can instantly brighten. It counteracts the yellow, bringing a healthy luminosity back to your complexion.
- Hyperpigmentation/Dark Spots (Brown): While not strictly on the color wheel in the same way, brown spots can appear purplish or grayish on different skin tones. For lighter skin, a peach corrector can often soften these. For deeper skin tones, an orange or even a red corrector might be needed to effectively mask the darkness.
Observing your skin in natural light is key. Pay attention to areas that consistently appear discolored or uneven. Do you have persistent redness around your nose? Are your under-eyes always shadowed? By accurately identifying these concerns, you can build a targeted color correcting routine that addresses your unique needs, leading to a more balanced and radiant base for the rest of your makeup application.
Choosing the Right Color Correcting Formulas
The efficacy of your color correcting efforts isn’t solely dependent on selecting the correct shade; the formula you choose also plays a significant role. Color correctors come in various textures, each suited for different skin types and areas of application. Understanding the nuances of creams, liquids, and powders will help you achieve the most natural finish.
Liquid color correctors are generally lightweight and offer sheer to medium coverage. They are excellent for larger areas of the face, such as overall redness, and are particularly well-suited for normal to oily skin types. Their thin consistency blends seamlessly, preventing any heavy or cakey appearance. They are also a good choice for those new to color correcting, as they are forgiving and easy to work with.
Formulas for Every Need
- Liquid Correctors:
- Best for light to medium coverage over wider areas.
- Ideal for oily or combination skin.
- Easily blendable, providing a natural finish.
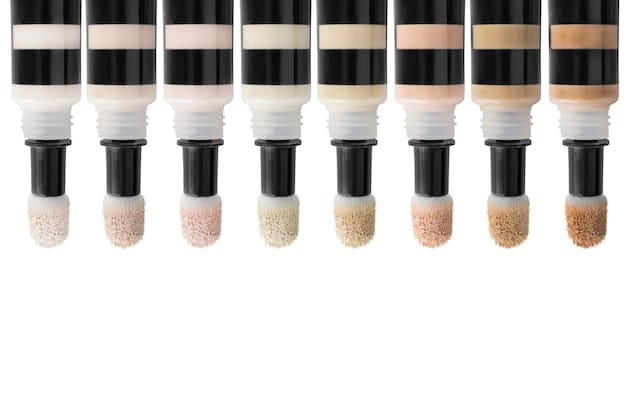
Cream color correctors, often found in pots or stick formats, offer more opaque coverage. Their richer texture makes them perfect for targeting specific, concentrated areas of discoloration, such as intense blemishes or stubborn dark circles. They are particularly beneficial for dry or mature skin, as their emollient properties can prevent settling into fine lines. However, they require careful blending to avoid a heavy look.
- Cream Correctors:
- Provide concentrated coverage for specific spots.
- Great for dry or mature skin due to their hydrating nature.
- Require precise application and thorough blending.
Powder color correctors are less common but can be useful for those with very oily skin or for setting liquid and cream correctors. They offer the lightest coverage and are typically used to subtly tone down overall discoloration or to lock in creamy products, ensuring longevity. They can be tricky to work with for beginners, as uneven application can look dusty.
When selecting a formula, consider your skin type and the specific problem you’re addressing. For instance, a liquid green corrector might be best for generalized facial redness, while a creamy peach corrector would be more effective for concentrated dark circles. Always remember that a little goes a long way with color correctors, regardless of the formula. Applying too much can lead to an unnatural cast, making your subsequent foundation application more challenging.
Ultimately, the right formula enhances the effectiveness of your chosen color corrector, allowing it to seamlessly integrate into your makeup routine and contribute to that coveted flawless finish.
Application Techniques for Beginners
Mastering color correction requires more than just knowing which shades to use; proper application is key to achieving a flawless, natural-looking finish. For beginners, the goal is to apply just enough product to neutralize the discoloration without creating a visible layer that foundation can’t cover. Precision and gentle blending are your best friends.
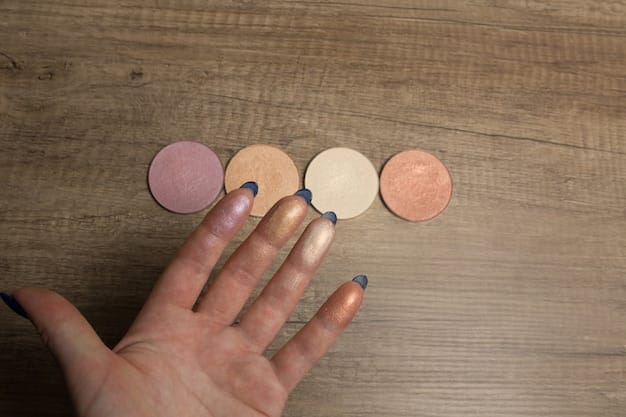
Start with a clean, moisturized face. A well-prepped canvas allows the correctors to glide on smoothly and blend seamlessly. Use your fingers, a small makeup brush, or a damp beauty sponge for application. Each tool offers a slightly different level of control and finish, so experiment to find what works best for you.
Step-by-Step Guide to Flawless Application
The order of application is critical to ensure that your color correction efforts translate into a seamless base. Remember, less is often more when it comes to these highly pigmented products.
- Targeted Application: Apply a tiny amount of the chosen color corrector directly onto the area of concern. For redness, dab green corrector only on the blemish or the reddest part of your cheeks. For dark circles, apply peach/orange corrector specifically over the blue/purple areas. Avoid spreading it to unblemished skin, as this can make your skin look unnatural.
- Gentle Blending: Once applied, gently tap the edges of the product to blend them into the surrounding skin. Do not rub, as this can move the product around or remove it entirely. Use your ring finger for under-eye areas due to its soft touch, or a tiny flat brush for precision on blemishes. The aim is to blur the edges so the corrector feathers out, rather than sitting as a harsh line.
- Allow to Set: Give the corrector a moment to settle onto the skin. This brief pause allows the product to meld with your skin’s natural warmth, making subsequent steps easier.
- Foundation/Concealer Application: Now, apply your regular foundation. Instead of swiping, gently pat or stipple your foundation over the corrected areas. Swiping can displace the corrector. Use a damp beauty sponge or a stippling brush for uniform coverage. If extra coverage is needed, apply a thin layer of concealer over the foundation, again patting it gently.
- Setting Powder (Optional): For extra longevity, especially in humid climates or for oily skin, a light dusting of translucent setting powder can lock everything in place. Use a fluffy brush and a very light hand to avoid disturbing the layers underneath.
Remember, the goal is to neutralize, not to completely erase. A subtle correction will look far more natural than an overly heavy one. Practice makes perfect, and with each application, you’ll gain a better understanding of how your skin reacts and how much product you truly need to achieve that flawless base.
Incorporating Color Correcting into Your Daily Routine
Integrating color correcting into your daily makeup routine doesn’t have to be a time-consuming ordeal. With a few key products and a targeted approach, it can become a seamless step that significantly elevates your overall complexion. The key is to identify your consistent skin concerns and focus on correcting those, rather than attempting to perfect every minor imperfection.
For most people, daily color correcting will involve addressing dark circles and perhaps a touch of redness. This typically means reaching for a peach/orange corrector for the under-eye area and a green corrector for any active blemishes or areas of persistent flush. The beauty of modern formulations is their blendability, allowing for quick, efficient application even on busy mornings.
Streamlining Your Correcting Process
To make color correcting a habit, simplify the process and ensure you have the right tools readily available. Think of it as a primer for your complexion, creating the perfect canvas before the main artistry begins.
- Assess Your Needs Daily: Before you even reach for your foundation, take a moment to assess your skin in good lighting. Are your dark circles particularly prominent today? Is there a new blemish that needs neutralizing? This quick evaluation helps you decide which correctors (if any) are necessary.
- Minimal Product, Maximum Impact: Resist the urge to slather on product. Color correctors are highly pigmented, and a tiny dot is often all you need. Applying too much will create a heavy, unnatural look and can be difficult to conceal with foundation.
- Blend Before Foundation: After applying your corrector, gently blend the edges until they seamlessly melt into your skin. This step is crucial. If you see distinct patches of color, they will likely show through your foundation.
- Layer Smart: Correctors go on after your skincare and primer, but before your foundation. This layering order ensures the corrector works as a base layer to neutralize, allowing your foundation to provide uniform coverage over the now-even skin tone.
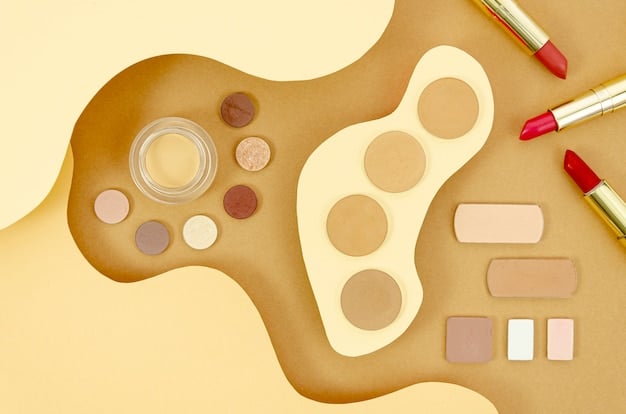
- Consider Multi-Tasking Products: Some brands offer palettes with multiple corrector shades, or even color-correcting primers (green-tinted for redness, lavender for sallowness). These can be great time-savers, allowing you to address multiple concerns with one product or step.
By making color correcting a strategic and deliberate part of your routine, you’ll find that your foundation looks better, lasts longer, and your overall complexion appears more radiant and even. It’s a small investment of time that yields significant results in achieving that coveted flawless skin.
Advanced Tips and Troubleshooting
Once you’ve mastered the basics of color correcting, you might encounter situations where the standard rules seem to fall short. This section delves into advanced tips and common troubleshooting scenarios, helping you refine your technique and achieve an even more polished finish. Sometimes, a subtle tweak in application or product selection can make all the difference.
One advanced tip involves layering correctors for complex discolorations. For instance, if you have very deep, almost black, under-eye circles that also have a hint of green, you might first apply an orange corrector to neutralize the deepest darkness, then a peach corrector on top to brighten and blend. This multi-layered approach tackles different facets of the discoloration simultaneously, creating a more nuanced correction.
Common Challenges and Solutions
- “My corrector looks chalky/cakey”: This usually happens due to applying too much product, especially with cream formulas.
- Solution: Use a minimal amount. Apply a tiny dot and blend thoroughly. If it’s still heavy, try a liquid formula that offers sheerer coverage. Ensure your skin is well-hydrated underneath.
- “The corrector color shows through my foundation”: This indicates insufficient blending or incorrect shade selection.
- Solution: Make sure the edges of your corrector are completely blended. Also, ensure you’re using the right shade for your specific skin tone and concern; sometimes a slightly warmer or cooler tone is needed. Pat, don’t swipe, your foundation over the corrected area.
- “My corrected area looks gray/ashy”: This is a common issue when the corrector is too light for your skin tone, or if it’s overcompensating.
- Solution: Ensure your orange/peach corrector matches the depth of your skin tone. For deeper skin tones, a true red or deep orange might be more effective than peach. The corrector should neutralize, not completely remove, the underlying color.
- “Corrector settles into fine lines”: This often occurs with thicker cream formulas or dehydrated skin.
- Solution: Use a hydrating eye cream beforehand. Opt for lighter liquid correctors with a dewy finish. Set very lightly with a translucent powder only after blending.
Another advanced technique is “spot correcting” with a tiny, precise brush for very small, isolated areas, such as a single red blemish. This prevents you from applying product to surrounding clear skin, leading to a more natural result. Always remember that the goal of color correcting is to create a neutral, even starting point, not to apply a thick layer of makeup. The less product you can use to achieve neutrality, the more natural and flawless your final look will be.
Color Correcting Trends and Innovations in 2025
The beauty industry is constantly evolving, and color correcting is no exception. In 2025, we’re seeing exciting trends and innovations that make this essential technique even more accessible, effective, and tailored to individual needs. The focus is shifting towards multi-functional products, sustainable practices, and technology-driven personalization, redefining how we approach a flawless complexion.
One prominent trend is the rise of smart, adaptive color correctors. These formulations claim to “self-adjust” to your skin tone upon application, offering a more universal approach to neutralizing specific concerns. While not fully replacing traditional color theory, these products are designed to simplify the shade selection process, particularly for beginners or those seeking a quick, on-the-go solution. They often achieve this by using micro-encapsulated pigments that burst and release color upon contact with the skin, blending seamlessly.
Key Innovations and Trends to Watch
The landscape of color correcting is becoming more sophisticated, moving beyond basic green and orange tubes to encompass a holistic approach to skin enhancement.
- Customizable Palettes and Apps: Brands are increasingly offering customizable palettes where you can select individual corrector pods based on your unique concerns. Complementary apps use AI to analyze a selfie and recommend precise shade combinations, taking the guesswork out of product selection.
- Skincare-Infused Formulations: Color correctors are no longer just makeup; they’re blurring the lines with skincare. Products now come infused with active ingredients like hyaluronic acid for hydration, vitamin C for brightening, or niacinamide for reducing redness over time. This dual-action approach means your corrector isn’t just masking; it’s also treating your skin.
- “Nude” Color Correctors: For subtle concerns or to simply brighten without adding another color, “nude” or skin-toned correctors are gaining popularity. These are typically slightly lighter than a standard concealer and are designed to brighten shadowed areas or subtly even out skin tone without introducing a distinct correcting hue.
- Sustainable Packaging: As environmental consciousness grows, beauty brands are prioritizing sustainable packaging for color correctors, from refillable compacts to tubes made from recycled materials. This aligns with a broader industry shift towards eco-friendly practices.
- Virtual Try-On Tools: Augmented reality (AR) filters within beauty apps allow consumers to virtually try on different corrector shades before purchasing, offering a more confident buying experience and minimizing product waste from incorrect choices.
The innovations in 2025 underscore a commitment to making color correcting more intuitive, effective, and integrated into a comprehensive beauty routine. From personalized shade matching to skincare benefits, these advancements suggest a future where achieving flawless skin is not just about covering imperfections, but about truly enhancing and caring for your complexion from within.
| Key Point | Brief Description |
|---|---|
| 🟢 Neutralizing Redness | Green correctors cancel out redness from blemishes or rosacea. |
| 🍑 Tackling Dark Circles | Peach/orange correctors effectively hide blue/purple under-eye circles. |
| ✨ Brightening Dullness | Lavender/purple correctors counteract yellow tones for a brighter complexion. |
| 💧 Formula Matters | Choose liquid for wide areas, cream for spot correction based on skin type. |
Frequently Asked Questions
▼
Color correcting is a makeup technique that uses complementary colors to neutralize specific skin discolorations, such as redness or dark circles. It’s important because it creates an even base for foundation, allowing your complexion to appear truly flawless and natural without relying on heavy layers of makeup.
▼
Choosing the right corrector depends on the specific discoloration. Use green for redness, peach or orange for blue/purple dark circles, yellow for purple veins/bruises, and lavender for sallowness. Refer to the color wheel principle: opposites cancel each other out, ensuring targeted and effective neutralization.
▼
Apply a very thin layer of corrector directly onto the discolored area, then gently tap the edges to blend. Avoid rubbing. Less is more; applying too much product will make it look cakey. Use clean fingers, a small brush, or a damp beauty sponge for precise application and seamless blending.
▼
Color corrector should always be applied after your skincare and primer, but before your foundation. This layering ensures the corrector works as a base to neutralize skin tone, allowing your foundation to then provide uniform coverage over the now-even skin, resulting in a smoother overall finish.
▼
Yes, color correcting can significantly help with hyperpigmentation and dark spots. For lighter skin tones, a peach corrector can often soften their appearance. For deeper skin tones, an orange or even a red corrector is more effective at neutralizing the darker brown or grayish tones that often accompany hyperpigmentation.
Conclusion
Navigating the realm of makeup can often feel like a complex endeavor, but understanding the core principles of color correcting significantly simplifies the journey to a desire for flawless skin. As we’ve explored, this technique is not about masking imperfections with heavy layers, but rather about strategically neutralizing discolorations using the inherent power of the color wheel. By identifying your specific skin concerns, choosing the appropriate formula, and employing precise application techniques, you empower yourself to create a balanced, radiant canvas that enhances your natural beauty. Whether you’re battling persistent redness, stubborn dark circles, or dullness, the targeted approach of color correcting allows your subsequent foundation and concealer to perform at their best, resulting in a truly seamless and luminous complexion for 2025 and beyond.


